Spring Boot 简化了基于 Spring Framework 的应用程序开发,Spring Boot 的核心功能之一就是 Starter,它极大简化了项目的依赖管理和配置,帮助开发者快速启动项目。而在 Spring Boot 3 中,Starter 仍然是一个至关重要的组件,并进行了很多改进和增强。
本文将深入介绍 Spring Boot 3 中的 Starter,解释其原理、作用,并通过实例展示如何自定义和使用 Starter。
1. 什么是 Spring Boot Starter?
Spring Boot Starter 是一组有针对性的 Maven 或 Gradle 依赖项,用于快速集成特定的技术栈。例如,spring-boot-starter-web 提供了构建 Web 应用程序所需的常见依赖项,如 Spring MVC 和嵌入式 Tomcat。开发者只需引入对应的 Starter 依赖,就可以免去手动配置大量的依赖和初始化代码。
Spring Boot 提供了各种开箱即用的 Starter,用于不同场景的开发,包括:
- Web 开发:
spring-boot-starter-web - JPA 数据库:
spring-boot-starter-data-jpa - 测试:
spring-boot-starter-test - 消息队列:
spring-boot-starter-amqp
Starter 的优势
- 简化依赖管理: 开发者无需记住每个组件的具体版本,Spring Boot Starter 将常用组件以兼容的版本打包在一起。
- 自动配置: 通过 Spring Boot 的自动配置机制,Starter 帮助我们自动配置项目所需的 Bean 和组件。
- 提升开发效率: 通过引入 Starter,可以避免大量手动配置,提高开发效率。
2. Spring Boot 3 中的改进
Spring Boot 3 在 Starter 机制上延续了之前版本的特点,同时引入了一些新的特性:
- Java 17 支持:Spring Boot 3 要求使用 Java 17,Starter 也适配了最新的 Java 版本,提升了性能和安全性。
- AOT 优化:Spring Boot 3 引入了 AOT(Ahead-of-Time)编译,部分 Starter 可以利用 AOT 优化,提高应用程序的启动速度和内存利用率。
- 增强的 Native Image 支持:Spring Boot 3 加强了对 GraalVM Native Image 的支持,部分 Starter(如 Web Starter 和 Data JPA Starter)已经优化用于构建原生镜像。
3. 常见的 Starter 示例
3.1. 使用 Web Starter 构建 Web 应用
首先,来看看如何使用 spring-boot-starter-web 快速构建一个简单的 Web 应用。
Maven 配置
<dependency>
    <groupId>org.springframework.boot</groupId>
    <artifactId>spring-boot-starter-web</artifactId>
</dependency>
控制器示例
import org.springframework.web.bind.annotation.GetMapping;
import org.springframework.web.bind.annotation.RestController;

@RestController
public class HelloController {

    @GetMapping("/hello")
    public String sayHello() {
        return "Hello, Spring Boot 3!";
    }
}
通过引入 spring-boot-starter-web,我们得到了 Spring MVC 和 Tomcat 的默认配置。运行这个应用后,可以直接访问 http://localhost:8080/hello,得到简单的返回结果。
3.2. 使用 Data JPA Starter 集成数据库
接下来,我们展示如何通过 spring-boot-starter-data-jpa 和 H2 数据库快速集成一个简单的数据库应用。
Maven 配置
<dependency>
    <groupId>org.springframework.boot</groupId>
    <artifactId>spring-boot-starter-data-jpa</artifactId>
</dependency>
<dependency>
    <groupId>com.h2database</groupId>
    <artifactId>h2</artifactId>
    <scope>runtime</scope>
</dependency>
实体类和仓库接口
import javax.persistence.Entity;
import javax.persistence.GeneratedValue;
import javax.persistence.GenerationType;
import javax.persistence.Id;

@Entity
public class User {

    @Id
    @GeneratedValue(strategy = GenerationType.IDENTITY)
    private Long id;
    private String name;

    // Getter 和 Setter 省略
}
import org.springframework.data.jpa.repository.JpaRepository;

public interface UserRepository extends JpaRepository<User, Long> {
}
服务类和控制器
import org.springframework.beans.factory.annotation.Autowired;
import org.springframework.web.bind.annotation.*;

import java.util.List;

@RestController
@RequestMapping("/users")
public class UserController {

    @Autowired
    private UserRepository userRepository;

    @GetMapping
    public List<User> getAllUsers() {
        return userRepository.findAll();
    }

    @PostMapping
    public User createUser(@RequestBody User user) {
        return userRepository.save(user);
    }
}
通过引入 spring-boot-starter-data-jpa,Spring Boot 自动为我们配置了 JPA 和 H2 数据库,无需额外的手动配置。
4. 自定义 Starter 示例
有时,我们可能需要开发自己的 Starter,以便在多个项目中复用公共的配置和依赖。下面是创建自定义 Starter 的简单示例。
4.1. 创建自定义的 Spring Boot Starter
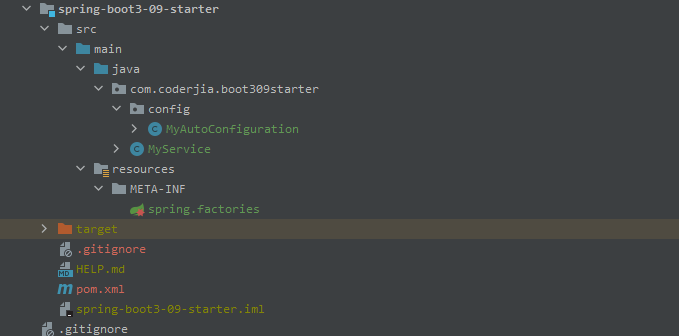
首先,我们创建一个名为 spring-boot3-09-starter 的 Maven 项目。项目结构如下:
spring-boot3-09-starter
│
├── src/main/java/com/coderjia/boot309starter/config/MyAutoConfiguration.java
├── src/main/java/com/coderjia/boot309starter/MyService.java
├── src/main/resources/META-INF/spring.factories
└── pom.xml

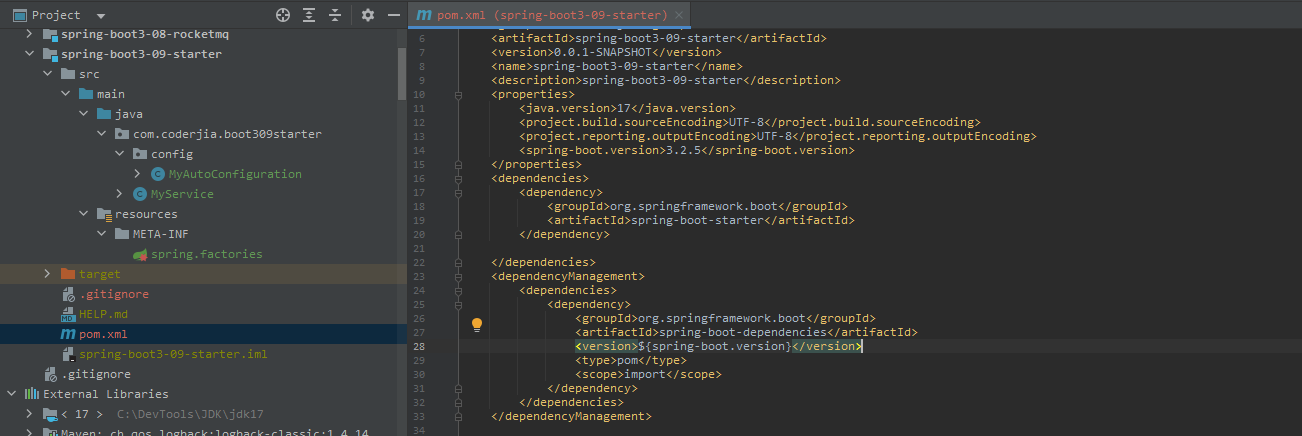
根据需要添加依赖,这里只添加spring-boot-starter作为基础依赖:

4.2. AutoConfiguration 类
package com.coderjia.boot309starter.config;

import com.coderjia.boot309starter.MyService;
import org.springframework.context.annotation.Bean;
import org.springframework.context.annotation.Configuration;

/**
 * @author CoderJia
 * @create 2024/09/24 15:17
 * @Description
 **/
@Configuration
public class MyAutoConfiguration {

    @Bean
    public MyService myService() {
        return new MyService();
    }
}
MyAutoConfiguration 类会在应用启动时自动加载,并将 MyService 类注册到 Spring 容器中。
MyService 类定义如下:
package com.coderjia.boot309starter;

/**
 * @author CoderJia
 * @create 2024/09/24 15:18
 * @Description
 **/
public class MyService {


    public void hello() {
        System.out.println("MyService hello!");
    }
}
4.3. spring.factories 文件
为了让 Spring Boot 自动扫描并加载我们的配置类,我们需要在 resources/META-INF/spring.factories 文件中声明:
org.springframework.boot.autoconfigure.EnableAutoConfiguration=\
com.coderjia.boot309starter.config.MyAutoConfiguration
4.4. 使用自定义 Starter
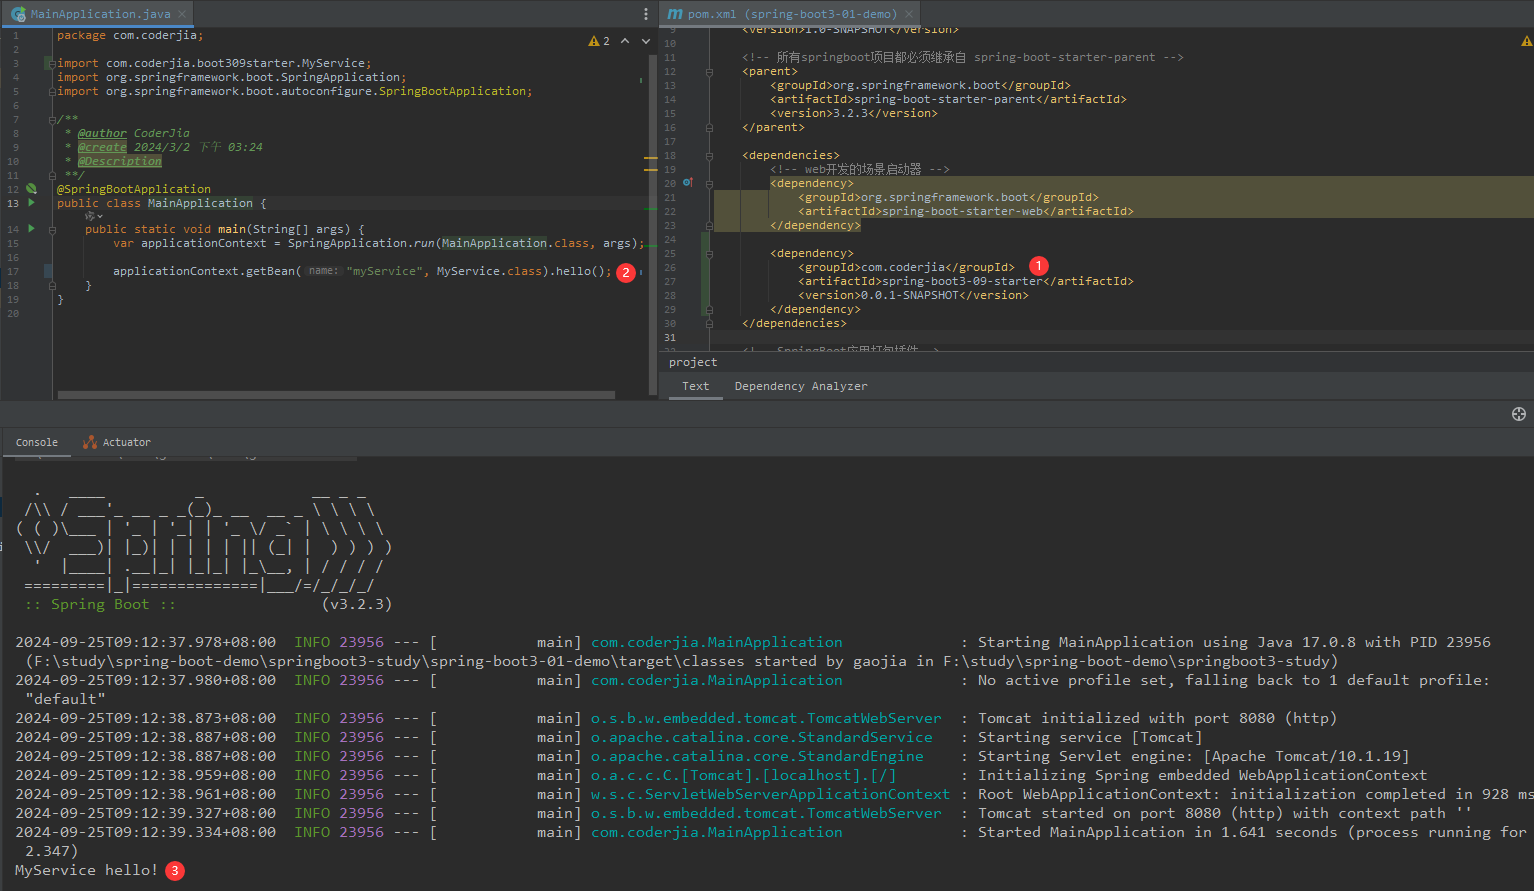
在另一个项目中使用这个自定义 Starter 时,只需添加以下依赖:
		<dependency>
			<groupId>com.example</groupId>
			<artifactId>spring-boot3-09-starter</artifactId>
			<version>0.0.1-SNAPSHOT</version>
		</dependency>
这样一来,我们的 MyService 就会被自动注入,并可以直接在项目中使用。
4.5. 验证
package com.coderjia;

import com.coderjia.boot309starter.MyService;
import org.springframework.boot.SpringApplication;
import org.springframework.boot.autoconfigure.SpringBootApplication;

/**
 * @author CoderJia
 * @create 2024/3/2 下午 03:24
 * @Description
 **/
@SpringBootApplication
public class MainApplication {
    public static void main(String[] args) {
        var applicationContext = SpringApplication.run(MainApplication.class, args);

        applicationContext.getBean("myService", MyService.class).hello();
    }
}

5. 结论
Spring Boot 3 的 Starter 机制使得开发复杂的 Spring 应用变得非常简单和快捷。通过提供一组预定义的依赖和自动配置,它减少了开发者手动配置的负担,同时增强了应用的可扩展性。Spring Boot 3 不仅保持了这一机制的优良传统,还通过支持 Java 17 和 AOT 编译等新特性进一步优化了 Starter 的使用体验。
开发者也可以通过自定义 Starter 来封装和复用公共功能,进一步提高开发效率。
推荐实践
- 在项目中尽量使用 Spring Boot 官方的 Starter,以获得最佳的兼容性和支持。
- 对于企业内部常用的公共功能,可以尝试开发自定义 Starter,以便在多个项目中复用。

